Showing posts with label Countryside. Show all posts

Thursday, October 4, 2012

Hopping again- Fall-i-days Thanksgiving Blog Hop

Yes we are hopping again, last month we covered Fall and Halloween and this month we are still covering Fall as well as Thanksgiving. If at anytime you come to a broken like you can find us all here. We officially start at 8 pm Mountain so if you are here earlier then that some of the blogs might not be up and running so make sure you check back.

You may have come from Jackies wonderful blog but if you are just starting here that's OK too.
 Here are the cards I made for this hop.


  • The card base is Naturals White, I thought the colorful flecks worked with our theme.
  • I stamped the truck from Countryside with Stazon onto Watercolor paper. I colored it with Ink and an Aqua Painter. 
  • I layered it onto to colors I pulled from the colored image, Gumball Green, Cajun Craze and So Saffron.
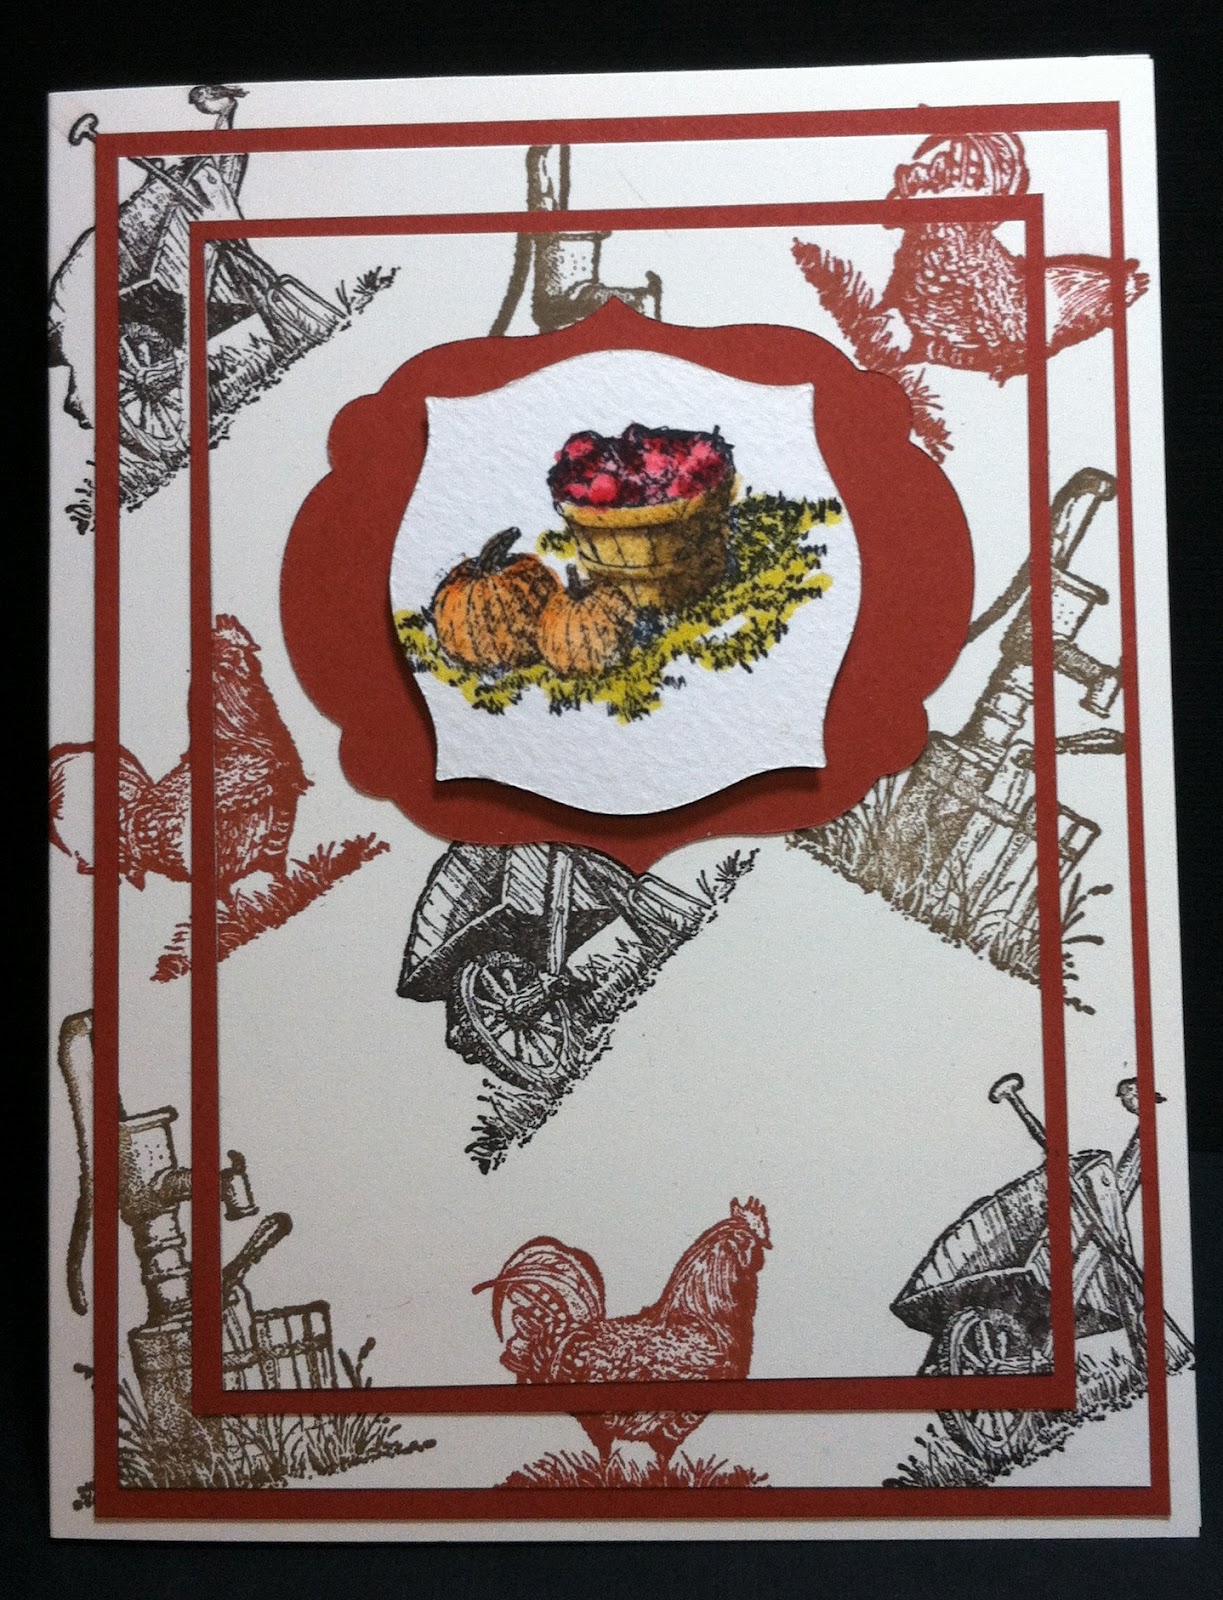
Next another triple layered card..


  • Cutting directions can be found here.
  • The CS is Very Vanilla and Cajun Craze.
  • I stamped images from Countryside on my layers in Cajun Craze, Early Espresso and Soft Suede.
  • The water colored image is from Harvest Blessing stamped with Stazon and colored with Ink ans an Aqua Painter.
  • It is cut with the Apothecary Accent Framelit layered onto Cajun Craze CS cut with the Labels Framelit.

And the last one uses the technique that we will be doing this month in club (Sorry for the crooked picture).

  • The base on this card is Naturals White. 
  • The phrase from Pursuit of Happiness was stamped with Versamark and heat embossed in Early Espresso.
  • The back ground paper for the image is Glossy White that has the Shaving Cream Technique done in Cajun Craze, More Mustard and Tangerine Tango. The image from Harvest Blessing was stamped onto it with Versamark and heat embossed in Early Espresso. The image was cut with the Labels Collection Framelit and layered onto Cajun Craze CS cut the next size larger.
So there you have it my fall colored as well as themed cards, let me know what you think.  Now head on over to Buffy's blog and see what she has made. I think you will like what you find.

Thursday, May 31, 2012

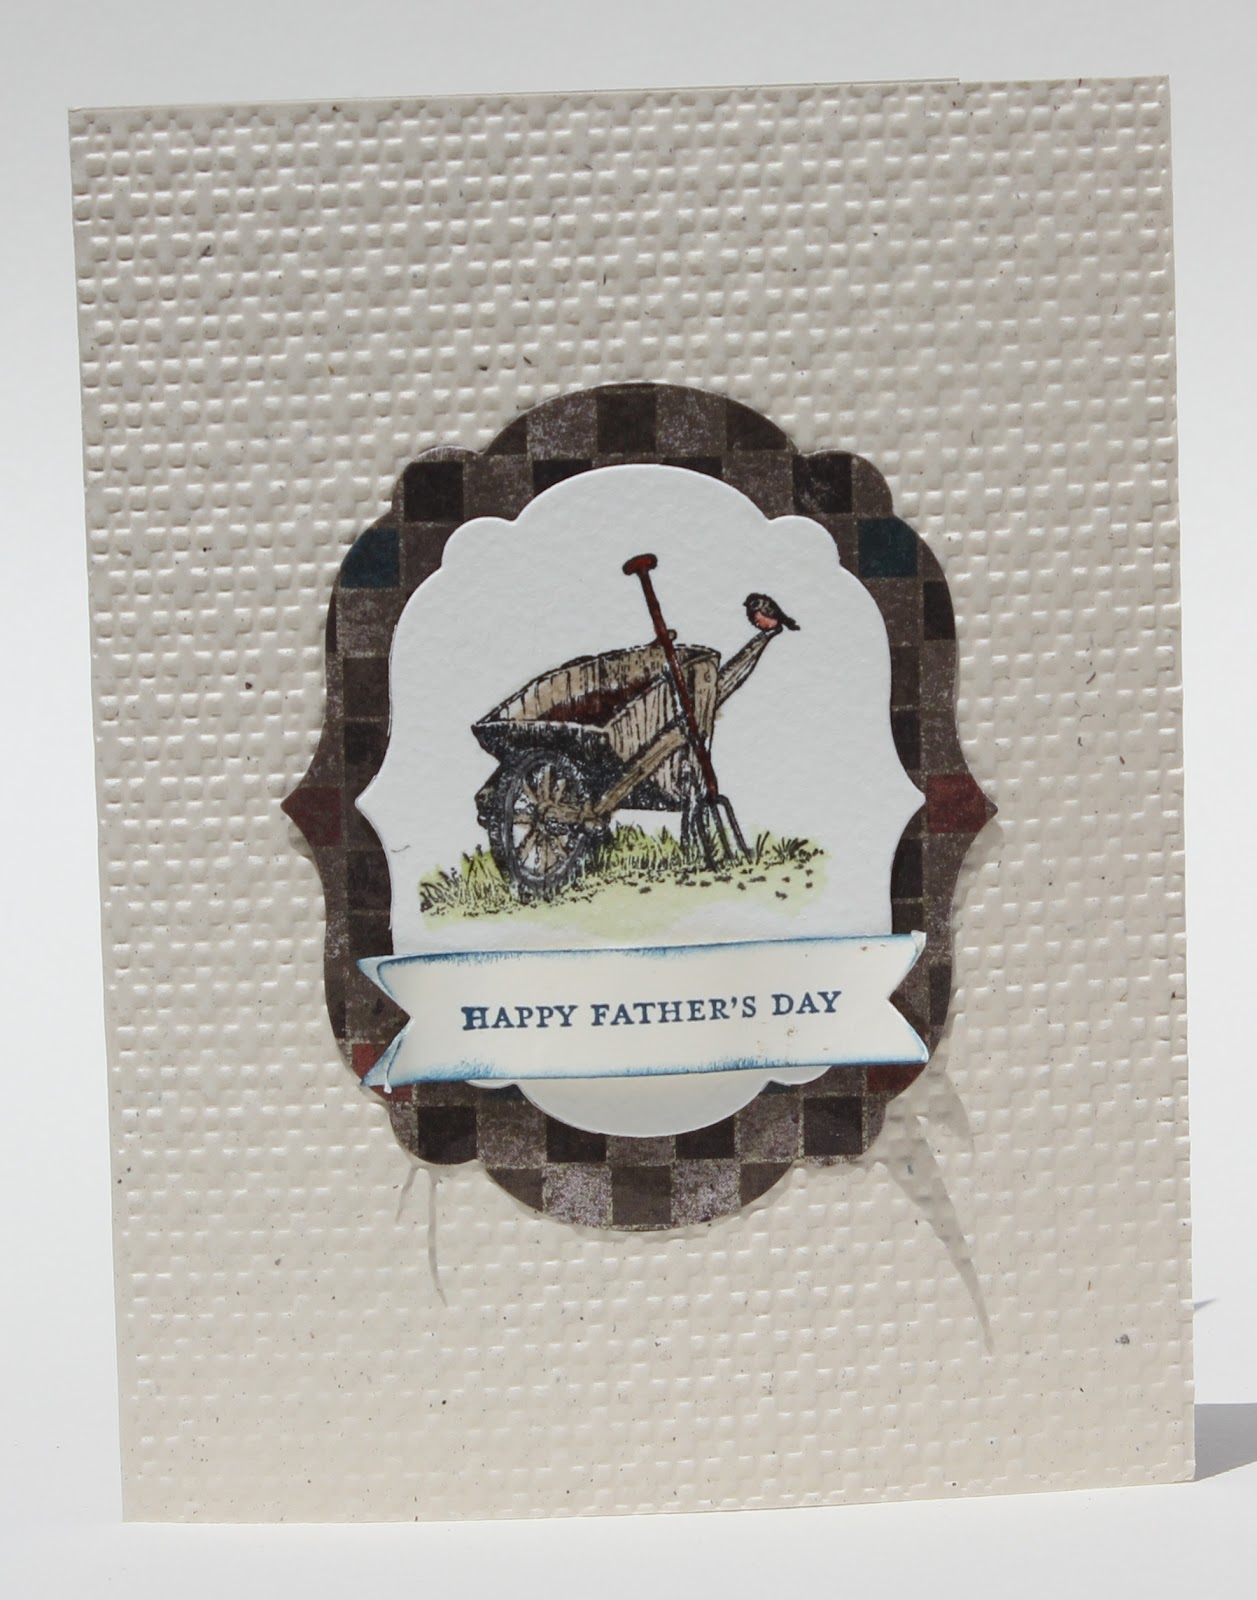
Countryside- Father's Day

I love texture!

  • The card base is Naturals White that I ran through the Big Shot with the Square Lattice Embossing Folder.
  • I cut a piece of Watercolor Paper with a Label Framelit then stamped the image from Countryside with Stazon on it I colored it with ink and an Aqua Painter.
  • The phrase is from Teeny Tiny Wishes, I stamped with Not Quite Navy  on a scrap of Naturals White the cut it with a new Framelit called Bitty Banners Framelits (available at noon tomorrow). I used the Bone Folder to break the fibers in the paper to give it some curl, then sponged the edges with Not Quite Navy.
  • I layered the image on a piece of Well Worn DSP cut a size larger the the image.
Simple but I like it, hope that you do too.

Wednesday, March 23, 2011

Countryside- Get Well Wishes

This is a sneak peek for my "Other Occasions" card class that is tomorrow, email ASAP if you want in, I doing the prep work for the class today.  Class times are 11 am and 6:30pm.
  • The card base is Confetti White CS with a 3 3/4" x 5" Early Espresso front.
  • I stamped the well image from Countryside on water color paper with Stazon and then colored it with Watercolor Wonder Crayons ans an Aqua Painter.
  • I layered Early Espresso slightly larger then the image onto a piece of Cajun Craze and ran it through the Big Shot with the Square Lattice folder.
  • I stamped Get Well Wishes from Teeny Tiny Wishes with Cajun Craze onto a piece of Confetti White and punched it out with the Decorative Label Punch. I punched a piece of Cajun Craze with the same punched and layered the two pieces of center so the there was a border of Cajun Craze around the phrase. I then attached it to the bottom of the Cajun Craze piece (see photo) and attached it to the card front.
  • I added the water colored image to the front on the card and was done.
So one of the great things about being a Stampin' UP! demo is the friendships you make.  Stampin' Up! has a forum just for demonstrators where we can share ideas, tips & techniques and just "chat" about stamping. I've made many "Online friends" that I hope to someday meet in person.

The way the forum is set up, if you don't specify a topic for a new discussion, it gets put into the top category, which often has nothing to do with what you're discussing, that isn't always a problem but it can be if the category is one people aren't reading and you're posting a question you need answered. Some of the posters were getting a little upset that no one was answering their posts. There are several ladies who have always taken the time to answer questions that others have, 3 of them have answered many of the questions I have had since I signed up as a demo a few years ago.  Well one of them Darrah(one of the ladies who is always willing to help),  started a thread explaining how to post your discussion in the appropriate area so that they could be found and answered. As new posts were added, Darrah's post was moved lower and lower on the page, and to bring it back to the top, someone would have to "bump" it up by commenting on the post.


Well after you've said, "thanks for the info" 4 or 5 times, it gets little old. So we hijacked the thread. We'd post comments on things we were working on at the moment to "bump" the post back to the top. After a few pages it had nothing at all to do with how to post a discussion( that information was still at the head of the thread), but was just a big long discussion about . . . everything! We talked about llamas, our children, pet peeves, and natural disasters ( one of our forum friends  lives in Japan so we heard first-hand news after the earthquake). After about 60 pages or so, we realized it wasn't helping anyone with their posts, but had found a great place to share with like minded friends, so we renamed our discussion "The Water Cooler," because it's where we go when we need a break or just a good laugh. It's a lot of fun, even my kids ask "what's new at the Water Cooler?" it is close to 200 pages long now.
So about  20 of us decided to do a card swap together. The only rules were make it a card front 4" x 5 1/8".  You could use techniques or not, embellishments or not, layers or not.  Since they were card fronts only, they can be layered on a card base.  It has been so much fun going to the mailbox each day and finding another card front, I have received about 14 so far and am looking forward to more. So over the next few days I am going to start showing you some of the the amazing talents of the Water Cooler Llama Mamas.  You are going to be amazed! So come back and checked out their work.

Monday, October 25, 2010

Countryside/water pump


Another watercolor card. . .
  • Card base is Very Vanilla with  layer of Early Espresso that was run through the Big Shot with the Square Lattice folder.
  • I stamped the pump on Watercolor paper with Stazon ink and colored the image with markers and an Aqua Painter.
  • I layered the image onto a piece of Cajun Craze and added it to the front of my card.
The images from Countryside are suitable for men as well as women, so this card could be given to either, stamp a greeting on the inside and it could be anything from a Birthday to a Thank-you.

Have a great day and find some time to stamp!

Friday, October 8, 2010

Countryside

Yesterday was the first day for my new club, I think everyone had a great time. This is the card we made, after I get some pictures taken I'll post the other project we did as well.  I show cased markers, showing watercoloring with markers and coloring directly on stamps with markers. The card. . .
  • The card base is Very Vanilla with a front of Not Quite Navy.
  • I stamped the truck from Countryside with Stazon on Watercolor paper, we stamped the apple 3 times on scraps of Watercolor paper.
  • Using Markers and an Aqua Painter we colored the images. By coloring directly on the paper in the areas you want the darkest shadows to be you can use the Aqua painter to pull the colors to the other areas. Going back and adding more marker and pulling it until satisfied with the depth of color. I used Not Quite Navy for the truck, Maria Mist for the sky(lay some water down on the sky area first and then maker to get a light even wash), More Mustard and Soft Suede for the ground, Garden Green for the sign, Riding Hood Red, Old Olive, Crumb Cake and Soft Suede for the apples and baskets.
  • I layered the image on Riding Hood Red CS, wrapped Linen Thread around one side and added a Jewelry Tag stamped with a phrase from Tiny tags in Riding Hood Red on Very Vanilla CS.
  • The 3 apples were colored with Riding Hood Red and Old Olive and then cut out. Using Glue dots I added them to the card front and then ran the card front through the Big Shot using the Square Lattice Die, embedding the apple images into the card front. I then added the front to the card base.
  • Finished the card off by adding the image to the card and using Soft Suede to add the Pump image from the same set to the inside of the card.